Using the PASCO Smart Cart to Teach the Right-Hand Rule
Barry Panas - Physics Teacher, St. John’s-Ravenscourt School, Winnipeg, Canada
We high school physics teachers tend to associate the right hand rules with electromagnetism. As a student, my first encounter with a right hand rule was when I was introduced to the magnetic field produced by the electric current in a long, straight wire: if you point the thumb of your right hand in the direction of the conventional current and imagine grasping the wire with your hand, your fingers wrap around the wire in a way that is analogous to the magnetic field that circulates around the wire.
I only later discovered that this same rule can be applied to rotational quantities such as angular velocity and angular momentum. The topic of rotation has become more important in AP physics when the program was updated from the older Physics B program. Strictly speaking, AP Physics 1 does not include the use of the right hand rule for rotation, but I have found that introducing it actually helps solidify student understanding of angular vectors. For a more extensive look at the Right Hand Rule, check out our in-depth guide Right Hand Rule in Physics.
Describing the direction of rotation as being clockwise or counterclockwise is helpful only if all parties involved have a common point of view, which is ideally along the axis of rotation. As with left and right, clockwise and counterclockwise depend on your point of view. This is why it is often preferable to describe translational motion in terms of north, south, east, west, up, and down, or with respect to a defined x-y-z coordinate system; directions can be communicated unambiguously, provided that everybody uses the same coordinate system.
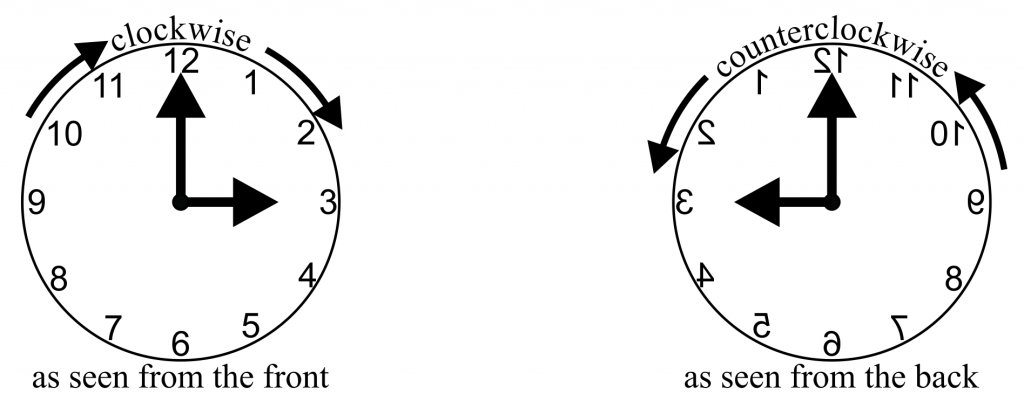
It is precisely for this reason that the right hand rule can (and should) be used for rotational motion. Consider the hands of an analog clock. Assuming that the clock is a typical one, it will have hands that turn “clockwise” when viewed from the “usual” point of view, but if the clock had a transparent back and you were to view it from the back you would see the hands turning “counterclockwise!” The observed direction of rotation (clockwise or counterclockwise) depends on the observer’s point of view.

Instead of using clockwise and counterclockwise, we can describe the direction of rotation with a right hand rule: if you curl the fingers of your right hand around with the direction of the rotational motion, your thumb will point in the direction of rotation, which will be along the axis of rotation. Applying this to the above we find that when viewing a clock from the front, the rotation of the hands is three dimensionally into the clock (away from the observer), and when viewing a clock from the back side, the rotation of the hands is three dimensionally out of the clock (toward the observer). If two people view a transparent clock at the same time but one observes it from the front while the other observes it from the back (i.e. the clock is between the two people who are facing each other), they will disagree on which way the hands turn (clockwise or counterclockwise) but will agree on this direction if both use the right hand rule convention to describe the direction of the rotational motion – both observers will agree that it is directed toward the person viewing the back side of the clock.
When first learning about the right hand rule, students are often initially confused, with many students failing to grasp why such a rule is even useful in the first place. Before introducing the right hand rule I like to begin by holding an object such as a meter stick while standing at the front of the classroom. I then rotate the meter stick through its center so that the students claim that it is rotating “clockwise” when asked. Being careful to keep the rotational motion as constant as possible, I then walk to the back of the room. It’s important that the students see that at no point did I stop the rotation of the meter stick – it is still turning the same way as before, and yet at some point each student finds that they must turn around in order to continue to see it. Many students are astonished to see that the meter stick is now rotating counter clockwise from their (now reversed) point of view. This helps establish the need for a better way to describe rotation.

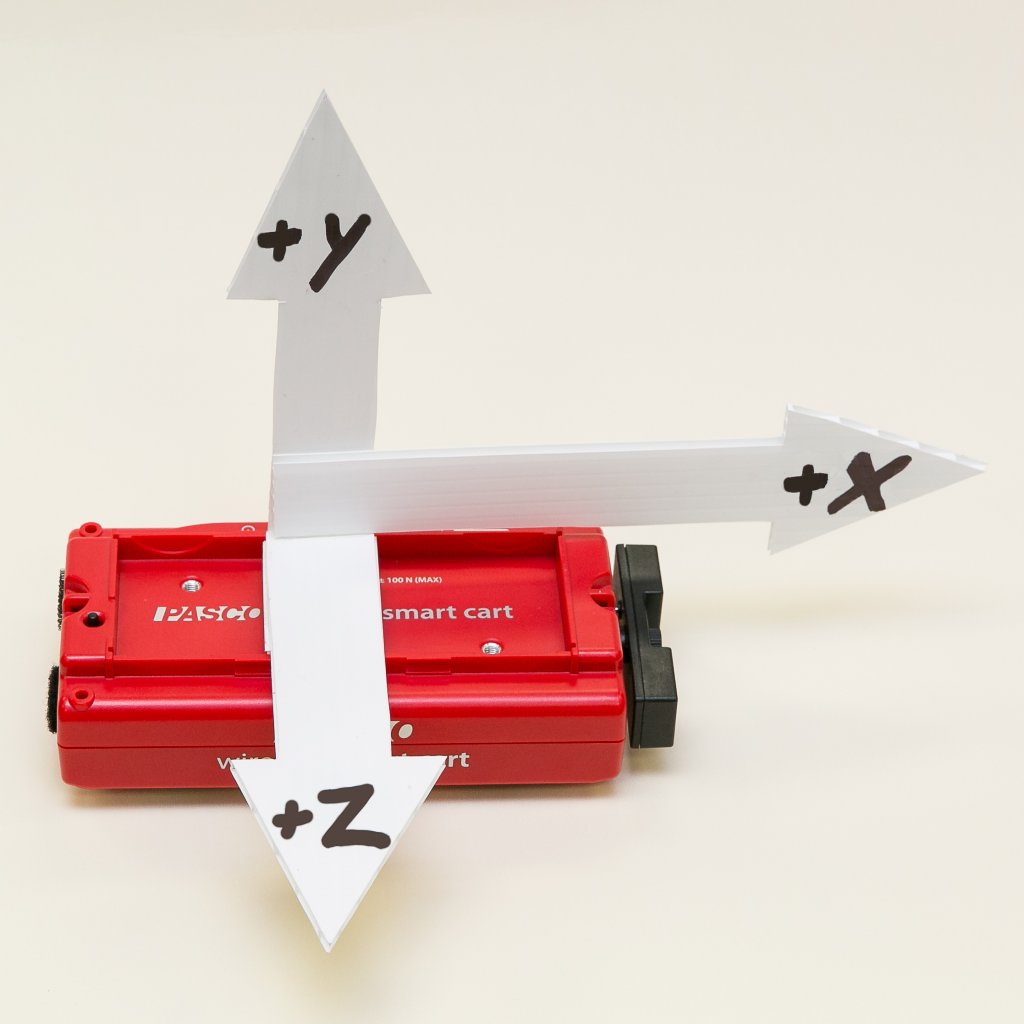
I then introduce the right hand rule and go through a couple of examples. Traditionally, this would have been the end of it, but last year I was able to take advantage of my newly acquired PASCO Smart Cart, which has a wireless 3-axis gyroscope (i.e. rotational sensor). The coordinate system is fixed with respect to the cart, and is printed on the cart itself, but I like to make this more visible by attaching cardboard cutout vectors onto the cart which make the axes more visible to the students while I hold the cart up for them to see. I then set up a projected display of the angular velocity of the cart along each axis simultaneously. I then ask the students how I must turn the cart in order to get a desired rotation of my choosing (i.e. ±x, ±y, and ±z).
I really like how the carts, along with the live display of the three angular velocity components make the admittedly abstract right hand rule so much more concrete. Seeing the display agree with our predictions makes it so much more real and is much, much better than me merely saying “trust me.” I have found that introducing and using this right-hand rule with rotation has made using this same rule much more natural when using it to later relate the direction of current flow and the magnetic field.


